July 4th tealight holder craft with old yogurt glasses
Independence Day
The american birthday is approaching soon. Many americans will celebrate this day big time.
If you need a little bit of red, white and blue decoration to give your tables the perfect finish or you would like to show off with beautiful handmade decoration in front of your house – this tutorial is exactly what you need.
There are affiliate links in this post, meaning, at no additional cost to you, I will be compensated if you click through and take action. For full disclosure click here.
Pin it for later:

What you need
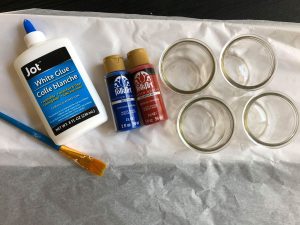
- Empty yogurt glasses (we used Oui yogurt but you can also use empty mason jars and any other big glass you like)
- Tissue paper
- Acrylic paint in red and blue
- Brush
- Mod podge (Or simply make your own with water and glue – read how further down)
- Sealer in case you want to use the decoration outside
- Water
- Tealight candles (or any other candle depending on the size of glass used)
This might be interesting for you too:
– DIY Easter craft projects
– Last-minute mother’s day crafts
– July 4th recipes
– Patriotic do-a-dot printables for kids
How to make it
Prepare the glasses
First make sure your glasses are completely clean. You can simply wash them out with hot water and some dish soap.
The label should come off pretty easy.
Once they are dry we can start.
To make you own mod podge you need to mix 1 part of glue with two parts of water. That’s it!
Depending on how much you need you can adjust. We used only a teaspoon since it was small glasses.

Get the paper ready
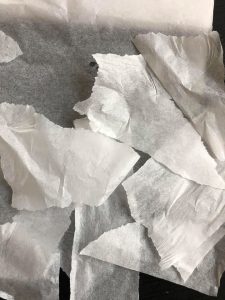
Start ripping the white tissue paper in small pieces.
If you want it super accurate you can cut them in same size stripes.
I like to rip it randomly to have many unique pieces of tissue paper.
Get crafty
Using a brush start spreading the homemade mod podge on your glass.
Do not use too much at once or it will run off the glass and all over the place.
Attach the ripped tissue paper to the mod podge and the glass.
You can do as many layers of paper as you want but I would not do more than two so you can see the tealight shine trough at the end.
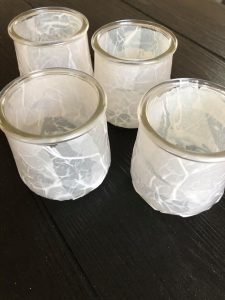
Let dry completely before you continue
After the tissue paper is completely dry you can get the paint ready.
I mixed just a drop of paint with about 3 teaspoons of water.
Start with one color and work your way trough all the glasses you want to paint.
If there is too much paint at the bottom you can use a paper towel and carefully take it off.
The paint does not have to be super carefully painted. In fact it will make your July 4th tealight more unique if it is a bit messy.
This is also a great craft to involve your kids in. It is simple enough to not frustrate them and they can be proud once the tealight is done.

By the time you painted the first color on all your glasses it should be dry enough to turn around and apply the other color.

You can put the colors in any order you want.
You could even paint a actual american flag on the 4th of July tealight glass.
Finish it up
Now it’s time to let the paint dry completely.
If you are planning to use them outside apply a sealer once the color is completely dry.
Good job you’re done!

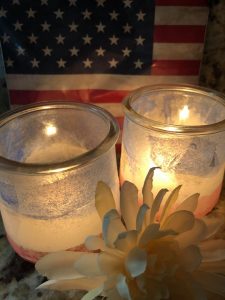
This can also make a great small gift to friends and family.
I can see them being painted in different colors for mother’s day, Valentine’s day or Easter.
How do you like these diy July 4th tealight jars?
I would love to see your creations – send me a picture via email: allaboutbabyblog@gmail.com
Do you need ways to keep your kid entertained while working from home? Get fun worksheets, coloring pages and more for free when you subscribe to my emails.
And find your tribe of like-minded parents in our Facebook group.


